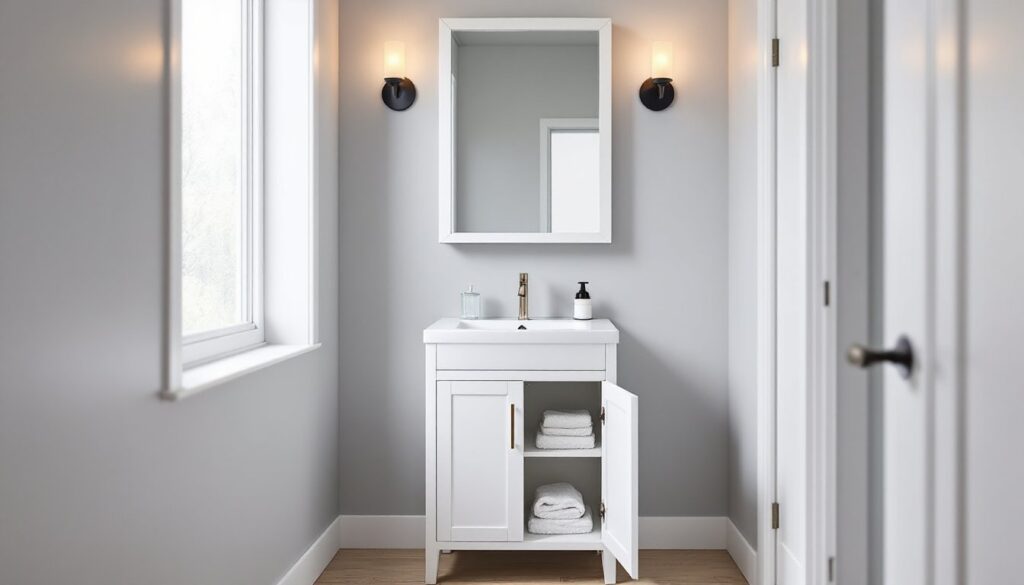
Tight powder rooms, half baths, and compact en suites don’t have to sacrifice function for footprint. An 18 inch bathroom vanity delivers sink, storage, and counter space in a profile that fits where standard 24- or 30-inch units won’t. Whether you’re tackling a basement bath retrofit, carving a guest powder room from a closet, or updating a vintage home with narrow walls, an 18 inch deep bathroom vanity with sink offers a legit vanity solution without encroaching into doorways or cramping circulation. This guide walks through selection criteria, installation fundamentals, and layout tricks to make small-space vanities work hard.
Table of Contents
ToggleKey Takeaways
- An 18 inch bathroom vanity reduces projection by 3 to 6 inches compared to standard 24- or 30-inch units, making it ideal for powder rooms, half baths, vintage homes, and basement conversions without sacrificing functionality.
- When selecting an 18 inch bathroom vanity, prioritize storage solutions like adjustable shelves or drawer-over-door configurations, and choose moisture-resistant materials such as marine-grade plywood or integrated ceramic countertops to ensure durability.
- Strategic placement options—including corner installation, floating wall-mounted units, or positioning beside tub alcoves—maximize floor space and traffic flow in compact bathrooms.
- A successful DIY installation requires careful planning, proper tools, and step-by-step sequencing from water shutoff through leak testing; dry-fit the P-trap first and verify wall stud locations for proper mounting support.
- Styling an 18-inch vanity with proportionate mirrors (13–15 inches wide), compact single-handle faucets, and minimal counter items creates a polished, intentional look that makes small bathrooms feel larger.
Why Choose an 18 Inch Bathroom Vanity?
An 18 bathroom vanity isn’t a compromise, it’s purpose-built for spaces where every inch counts. Standard vanities run 21 to 24 inches deep: an 18 inch deep bathroom vanity trims 3 to 6 inches from projection, which makes the difference between a functional aisle and a cramped squeeze.
Where an 18″ vanity shines:
- Half baths and powder rooms: Minimum clear floor space for a lavatory is typically 21 inches in front of the fixture per IRC guidelines. An 18-inch vanity leaves clearance without pushing into the door swing.
- Vintage homes with narrow bathrooms: Pre-1950s construction often has 5-foot-wide baths. Standard vanities crowd the room: an 18 in bathroom vanity maintains proportion.
- Basement and garage conversions: Rough-in plumbing and structural constraints sometimes dictate a shallow footprint.
- ADA or universal design layouts: Compact fixtures can ease wheelchair turning radius or walker maneuverability when paired with wall-hung or pedestal options.
You’ll sacrifice a bit of counter depth, an 18-inch vanity top typically measures about 16 inches usable once the backsplash and bowl are accounted for, but gains in floor space and traffic flow usually outweigh the trade-off.
Key Features to Look for in an 18 Inch Vanity
Not all 18 inch bathroom vanity with sink combos are created equal. Construction quality, storage layout, and finish durability vary widely, especially at compact dimensions where every cubic inch matters.
Storage Solutions
At 18 inches wide, internal volume is tight. Look for these smart layouts:
- Single soft-close door with adjustable shelf: The most common configuration. A removable or height-adjustable shelf lets you stash tall bottles or a small trash bin.
- Drawer over door: Less common but more functional. A shallow top drawer (3 to 4 inches) holds toiletries and grooming tools: the lower cabinet takes bulk items.
- Open shelf base: Saves a few dollars and keeps the look airy. Works well in guest baths with minimal daily storage needs. Add baskets or bins for small items.
- Wall-mounted units with concealed brackets: Frees up floor space for cleaning and gives the illusion of more room. Check that wall framing can support the load, vanity, countertop, sink, and contents can exceed 100 pounds. Mount to studs or use toggle anchors rated for the weight.
Skip units with fixed shelves unless the height works for your specific storage. You can’t retrofit adjustability later without drilling new holes.
Material and Finish Options
Cabinet construction:
- Solid wood (oak, maple, birch): Durable and repairable, but pricier and heavier. Ensure it’s sealed with polyurethane or conversion varnish for moisture resistance.
- Plywood with veneer: Good middle ground. Marine-grade or moisture-resistant plywood holds up better than standard cabinet-grade in humid baths.
- MDF or particleboard: Budget-friendly but vulnerable to water damage if seals fail. Acceptable for rarely used guest baths: avoid in kids’ or master baths with daily splash exposure.
Countertop materials:
- Integrated ceramic or vitreous china top/bowl: One-piece construction eliminates seams where water can seep. Easy to clean, mid-range cost.
- Quartz or solid surface: Seamless, repairable, and moisture-proof. Adds $100–$200 to the vanity cost but lasts decades.
- Laminate: Budget pick. Modern high-pressure laminates resist moisture better than older generations, but edges are still vulnerable.
Finish durability:
Bathrooms cycle through heat, humidity, and cleaning chemicals. Look for finishes labeled “moisture-resistant” or “catalyzed.” Avoid raw wood, chalk paint, or uncoated MDF unless you plan to seal it yourself with marine spar varnish or epoxy.
For inspiration on fixture pairings and finish trends in compact bathrooms, many designers reference curated sourcebooks on Remodelista.
Best Placement Ideas for Compact Vanities
An 18″ bathroom vanity opens up layout options that larger units can’t match. Strategic placement maximizes usable floor area and keeps plumbing runs efficient.
Corner placement: If the room is square or L-shaped, tuck the vanity into a corner with the door swing clearing it. You’ll preserve the center of the room for movement. Ensure rough-in plumbing (typically centered 18 inches off the side wall for a sink drain) aligns: if not, you may need an offset tailpiece or P-trap extension.
Against a short wall: Ideal for narrow galley-style baths. Position the vanity opposite the toilet or tub, leaving at least 30 inches of clearance between fixtures per IRC minimums (check local codes, some jurisdictions require more).
Floating or wall-mounted installation: Mounting the 18 deep bathroom vanity 32 to 36 inches above the finished floor (measure to the top of the counter) makes the room feel larger and simplifies floor cleaning. Wall-hung units are popular in modern and universal-design builds. For examples of floating and wall-mounted options, see curated collections of 18-inch floating vanities sorted by style and price.
Beside a shower or tub alcove: If the shower occupies a 36-inch alcove, an 18-inch vanity fits neatly alongside without blocking the door. Confirm that the door swing clears both fixtures.
Plumbing considerations: Most jurisdictions allow you to relocate a sink drain within the same wall cavity without a permit, but always verify. Extending supply lines is straightforward with PEX or braided flex risers: rerouting drains through floor joists or across rooms often requires a permit and may need a plumber.
Installation Tips for DIY Success
Installing an 18-inch vanity is a manageable weekend project if you’re comfortable with basic plumbing and carpentry. Here’s the sequence that avoids re-work.
Tools and materials:
- Adjustable wrench, basin wrench, channel locks
- Drill/driver with bits (for mounting and hinge adjustments)
- Level (24-inch torpedo or longer)
- Stud finder
- Silicone caulk, plumber’s putty, Teflon tape
- PEX or braided supply lines (measure existing lines and add 6 inches)
- P-trap and tailpiece (if not included with vanity)
- Safety glasses, work gloves
Step-by-step installation:
- Shut off water at fixture shutoff valves or main. Open the old faucet to relieve pressure.
- Disconnect supply lines and P-trap. Place a bucket under the trap. Loosen compression nuts with channel locks.
- Remove old vanity. If it’s caulked or screwed to the wall, cut caulk with a utility knife and back out screws. Watch for hidden fasteners under shelves.
- Check the wall for damage or mold. Now’s the time to patch drywall, treat any mildew with a 10% bleach solution, and let it dry.
- Locate studs. An 18-inch vanity may span only one stud. If you’re mounting a floor-standing unit, it’s less critical: if wall-mounted, you need solid blocking or at least two studs.
- Position the vanity and level it. Shim under the base as needed (composite shims won’t compress). For wall-mounted units, mark bracket holes, drill pilots into studs, and mount the bracket before hanging the cabinet.
- Attach to wall. Drive 2.5- or 3-inch screws through the cabinet back rail into studs. Don’t over-tighten MDF or particleboard backs, they’ll strip.
- Install faucet and drain assembly on the countertop before setting it on the cabinet (if it’s a drop-in or vessel sink). Apply plumber’s putty or the gasket provided under the drain flange.
- Set the countertop. Run a bead of silicone along the cabinet top edge. Lower the countertop, press firmly, and wipe excess.
- Connect supply lines. Hand-tighten, then snug with a wrench, about a quarter-turn past hand-tight. Over-tightening brass fittings can crack them.
- Install P-trap. The trap outlet should slope slightly toward the wall drain. Tighten compression nuts until snug: you shouldn’t need excessive force.
- Turn on water and check for leaks. Let it run for two minutes, checking under the sink with a flashlight and dry paper towel.
- Caulk the backsplash and side edges. Use tub-and-tile or kitchen-and-bath caulk (it has mildewcide). Tool the bead smooth and let cure per label directions.
Common pitfalls:
- Forgetting to dry-fit the P-trap. An 18-inch vanity’s cabinet depth may force you to use a shallow-seal or offset trap.
- Not sealing the sink cutout. If the countertop is MDF-core, seal the raw edge with polyurethane before dropping in the sink.
- Skipping the level. A vanity that’s even half a bubble off will drain poorly and look crooked.
If you’re running new drain lines or moving supply risers more than a few inches, call a licensed plumber. Most jurisdictions require permits for alterations to DWV (drain-waste-vent) systems.
Styling Your Small Vanity for Maximum Impact
An 18 inch bathroom vanity can look intentional and polished with the right styling. The goal is to add function and personality without cluttering limited counter space.
Mirrors and lighting:
- Hang a mirror that’s about 70–80% the width of the vanity (roughly 13 to 15 inches wide) to maintain proportion.
- Install sconces on either side at 60 to 65 inches above the finished floor, or a single fixture above the mirror. LED bulbs in the 2700–3000K range provide warm, flattering light without the yellow cast of incandescents.
Hardware and fixtures:
- Swap builder-grade cabinet knobs for brushed nickel, matte black, or brass pulls that complement the faucet finish.
- Choose a single-handle faucet with a compact footprint. Centerset faucets (4-inch spread) fit an 18-inch vanity better than widespread models.
Counter organization:
- Limit countertop items to two or three essentials: soap dispenser, toothbrush holder, or a small tray.
- Use drawer dividers or small bins inside the cabinet to corral makeup, razors, and first-aid supplies.
Color and pattern:
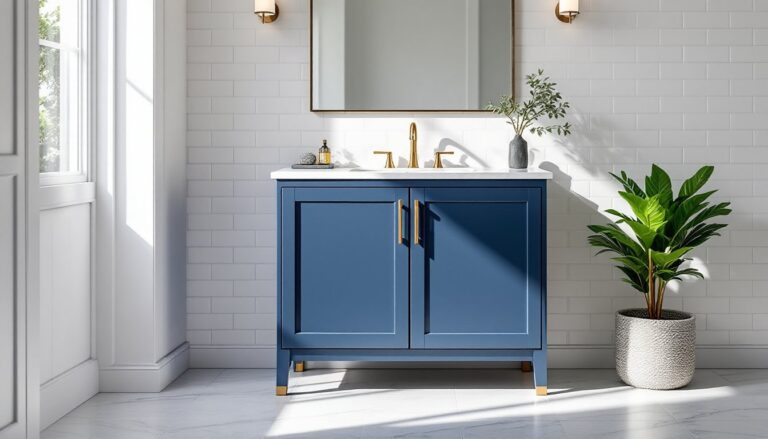
- Light or neutral vanity finishes, white, gray, natural oak, make a small bath feel larger. If the walls are bold, keep the vanity understated: if walls are neutral, a navy or forest-green vanity adds character.
- Peel-and-stick tile or a vinyl backsplash behind the vanity adds color without the cost of full-wall tiling.
Accessories:
- Mount a small floating shelf or medicine cabinet above the vanity for overflow storage.
- Add a peel-and-stick hook inside the cabinet door for a hair dryer or cleaning cloth.
For room design ideas that balance function and aesthetics in small baths, many homeowners turn to show content and before-and-after galleries featured on HGTV.
Final note: An 18-inch vanity rewards careful planning. Measure twice, dry-fit everything, and don’t skip prep work. With the right unit and a solid install, even the smallest bathroom can deliver full-size utility.