Swapping out a tired bathroom vanity is one of the quickest ways to refresh the entire room, and choosing blue puts you ahead of the neutral curve without sacrificing versatility. Blue bathroom vanities bring depth, character, and a surprisingly wide design range, from crisp navy to weathered coastal tones. They anchor a space without overwhelming it, pair well with most existing tile and fixtures, and can swing traditional or modern depending on hardware and finish. Whether you’re replacing a builder-grade oak cabinet or upgrading a powder room, a blue vanity bathroom setup offers both visual impact and practical storage. Here’s how to pick the right shade, style, and finish, and what to watch for during install and upkeep.
Table of Contents
ToggleKey Takeaways
- A blue bathroom vanity refreshes any space while offering versatility across design styles, hiding water spots better than white and avoiding the closed-in feeling of darker wood tones.
- Blue vanity bathroom designs range from dramatic navy and deep indigo to softer powder and robin’s egg blues, each requiring different lighting conditions and complementary color palettes.
- Pair your blue vanity with white or light-gray countertops and walls, and match hardware finishes (brass for warmth, matte black or nickel for modern looks) to create a cohesive, professional design.
- Blue painted vanities demand proper ventilation, moisture protection, and regular wiping to prevent finish degradation and mold growth in high-humidity bathroom environments.
- Wall-mounted blue vanity installations require secure mounting to studs or French cleats rated for 100+ lbs of weight, while freestanding models need proper leveling with shims to avoid cabinet stress.
- Sand, prime with a bonding primer, and apply water-based cabinet enamel in thin coats if refinishing an existing blue vanity, making it a manageable weekend DIY project for color changes or touch-ups.
Why Choose a Blue Bathroom Vanity for Your Home
Blue works in bathrooms because it reads clean and calm, qualities you want when brushing your teeth at 6 a.m. Unlike white, it hides minor scuffs and water spots better. Unlike darker woods, it doesn’t make small spaces feel closed in, especially in lighter tones.
A blue vanity bathroom also ages well. Paint trends shift, but blue has staying power across decades, from midcentury powder blues to the current wave of moody navies. If you’re planning to sell within five years, a well-executed blue vanity appeals to buyers looking for character without bold wallpaper or niche tile work.
From a material standpoint, most stock and semi-custom vanities now offer factory-painted blue finishes, which means durable catalyzed lacquer or conversion varnish instead of DIY brush marks. That finish quality matters in high-humidity environments where paint can peel or yellow if improperly applied.
Blue also pairs cleanly with the most common bathroom palettes: white subway tile, marble counters, brushed nickel or matte black fixtures, and both warm and cool grays. It’s one of the few accent colors that doesn’t box you into a single design lane.
Popular Shades of Blue for Bathroom Vanities
Not all blues behave the same under bathroom lighting. Here’s what each range delivers.
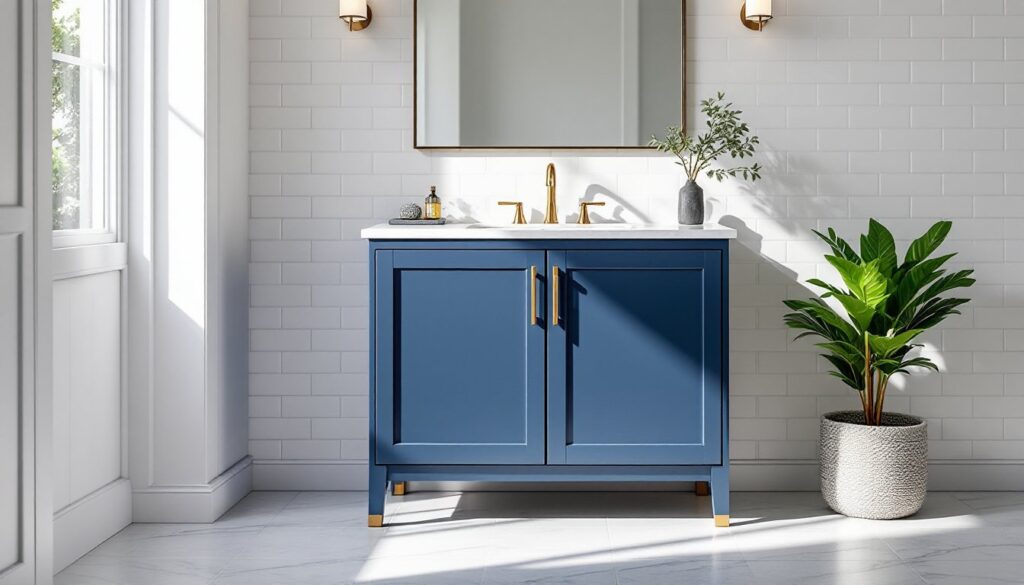
Navy and deep indigo (think Benjamin Moore Hale Navy or Sherwin-Williams Naval) offer dramatic contrast, especially with white or light-gray walls. These shades work best in bathrooms with good natural light or bright LED fixtures rated at 3000K or higher, otherwise they read nearly black. Navy vanities suit modern and transitional styles and pair well with brass, gold, or matte black hardware.
Slate and dusty blues (like SW Serious Gray-Blue or BM Philipsburg Blue) split the difference, visible color without the bold commitment. They’re forgiving in varied lighting and complement both marble and quartz countertops. This range often appears in farmhouse and coastal designs but translates across styles.
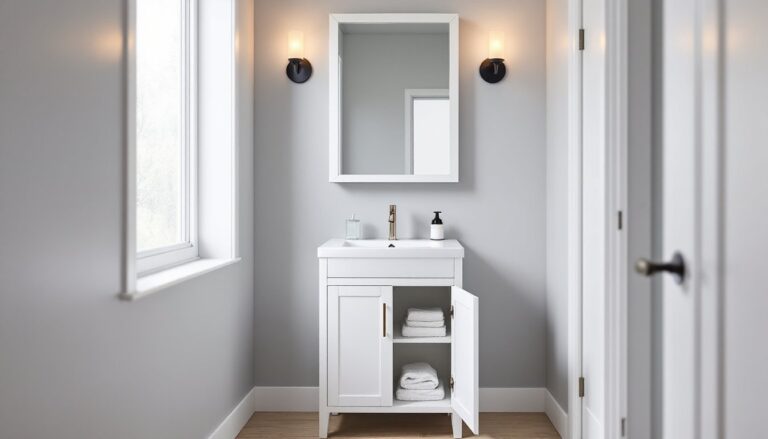
Powder and robin’s egg blues bring vintage or cottage charm. These lighter tones don’t hide water spots as well as deeper hues, but they open up tight powder rooms and pair beautifully with white wainscoting or beadboard. Expect to see these in traditional and shabby-chic installations, often with ceramic or porcelain knobs.
Teal and turquoise lean tropical or maximalist. They’re bold choices that demand cohesive tile and wall color, usually white, cream, or soft sand tones. Many designers on Houzz use teal vanities as the hero piece in otherwise neutral baths, anchoring the palette without competing patterns.
Choosing the Right Blue Vanity Style for Your Bathroom
Style dictates more than aesthetics, it affects cabinet construction, hardware compatibility, and installation complexity.
Modern and Contemporary Blue Vanities
Modern blue vanities typically feature slab doors (flat, frameless panels), minimal or integrated hardware, and either a floating (wall-mounted) or skirted base. Floating vanities expose plumbing, so confirm your supply and drain lines are clean or plan to replace them. Wall mounting requires blocking between studs or toggle anchors rated for the vanity’s loaded weight, figure 150–200 lbs for a 36-inch single-sink unit with a stone top.
Contemporary finishes often include high-gloss lacquer or matte painted MDF. Gloss shows every fingerprint but reflects light in windowless baths. Matte hides smudges but can be harder to clean if soap scum builds up. Look for water-based polyurethane or catalyzed finishes: they’re more moisture-resistant than standard latex paint.
Hardware tends toward sleek pulls in brushed nickel, polished chrome, or matte black. Integrated pulls (routed grooves along the door edge) eliminate hardware entirely and keep lines clean, though they’re trickier to retrofit if you’re painting an existing vanity.
Traditional and Vintage-Inspired Blue Vanities
Traditional styles use inset or overlay frame-and-panel doors, often with furniture-style feet or bracket bases. These vanities mimic antique dressers or wash stands, and many are actual repurposed furniture pieces, charming, but not always plumbed correctly from the factory.
If you’re converting a dresser or sideboard, expect to cut clearance for P-traps and supply lines, reinforce the top for a stone counter (dressers aren’t built to carry 60+ lbs of marble or granite), and possibly add a backsplash or finish the rear panel if it’s unfinished. Use a jigsaw with a fine-tooth blade for clean cutouts, and seal all raw wood edges with polyurethane to prevent swelling.
Vintage blues, chalky, distressed, or milk-paint finishes, suit farmhouse, cottage, and shabby-chic baths. These finishes are less durable than modern lacquers and may require periodic touch-ups, especially around the sink deck where water splashes. If you’re DIYing this look, topcoat with a water-based polycrylic (at least two coats) to protect the base paint.
Hardware choices include ceramic knobs, oil-rubbed bronze pulls, or antique brass bin pulls. Make sure new hardware aligns with existing holes if you’re retrofitting: drilling new holes in a finished vanity requires careful measurement and a brad-point bit to prevent splintering.
Design Tips for Styling Your Blue Bathroom Vanity
A blue vanity becomes the room’s anchor, so surrounding elements should either complement or deliberately contrast, not compete.
Countertop selection: White marble (Carrara, Calacatta) and white quartz are the safest pairings, they let the blue pop without clashing. Light-gray quartz works with slate and navy blues. Avoid busy granite patterns unless the vanity is a very muted blue: the combination reads chaotic. For a warmer look, pair dusty blues with honed limestone or travertine, but seal it well, both stones are porous and stain easily in bathrooms.
Wall color and tile: White or off-white walls (BM Simply White, SW Alabaster) maximize light and keep the vanity center stage. If you want color, go one or two shades lighter than the vanity to avoid a monochrome blur. Subway tile in white, cream, or soft gray is a no-fail backsplash. Patterned cement or encaustic tile can work, but limit it to a small accent zone, behind the mirror or as a single border row.
Hardware and fixtures: Match your faucet finish to cabinet hardware for a cohesive look. Brass and gold warm up navy and slate blues: chrome and nickel keep it crisp and cool. Matte black is trendy and works across most blue tones, but it shows water spots and requires regular wiping, especially on faucets. If your vanity has visible hinges, make sure they match the pulls: mismatched metals look unintentional unless you’re deliberately mixing (a trickier design move).
Lighting: Blue absorbs light, so don’t skimp on fixtures. Wall sconces flanking the mirror provide even, shadow-free light for grooming, aim for 75–100 watts equivalent LED per sconce in a bathroom under 50 square feet. Avoid yellow-toned bulbs (below 2700K): they make blues look muddy. Stick with 3000K daylight or 3500K neutral white. Many Remodelista features show blue vanities lit with brass or black sconces, those metallic accents tie the whole fixture package together.
Mirrors and accessories: Frameless mirrors suit modern vanities: framed mirrors (wood, metal, or painted) suit traditional styles. If your vanity is bold navy or teal, keep accessories minimal, white towels, a single plant, simple soap dispenser. Lighter blues can handle more pattern or texture in textiles and decor.
Installation and Maintenance Considerations
Most vanity installs are straightforward, but blue finishes and certain styles add a few wrinkles.
Pre-install prep: Measure your existing vanity footprint and door swing clearance, don’t assume a new unit will fit the same footprint, especially if you’re switching from a pedestal sink or going from 30 inches to 36 inches wide. Shut off water at the supply valves (usually under the sink or at the main if valves are seized). Disconnect supply lines and the P-trap: have a bucket and towels ready for residual water. If replacing drywall anchors or moving the vanity location, patch and paint walls before the new unit goes in.
Mounting: Freestanding vanities sit on adjustable feet or a plinth base, level them with shims (don’t crank the feet unevenly or you’ll stress the cabinet box). Wall-mounted vanities require a ledger board or French cleat screwed into studs, plus additional blocking if studs don’t align with the vanity’s mounting holes. Use 3-inch cabinet screws or lag bolts into solid wood blocking, not drywall anchors, for anything over 100 lbs loaded weight.
Plumbing connections: If the vanity has a center drain and your rough-in is offset, you may need a P-trap extension or offset adapter. Don’t force connections, misaligned traps leak. Flexible braided supply lines make hookup easier than rigid copper, but confirm they’re long enough before you start. Hand-tighten, then add a quarter-turn with a wrench, overtightening cracks fittings.
Finish protection: Blue paint, especially matte or chalk finishes, is more vulnerable to moisture than natural wood or laminate. Wipe up standing water immediately, especially around the faucet deck and anywhere the countertop meets the cabinet. Use coasters under soap dispensers and toothbrush holders to prevent ring stains. Avoid abrasive cleaners or scouring pads, stick to mild dish soap and a microfiber cloth. For high-gloss finishes, a spray bottle of diluted glass cleaner keeps streaks at bay.
Ventilation: Poor ventilation is the enemy of any painted vanity. Run the exhaust fan during and for 20 minutes after every shower. If your bathroom lacks a fan, installation is usually a DIY project if you have attic access and basic electrical skills, check local codes, as some jurisdictions require a licensed electrician for new fan wiring. Proper airflow prevents finish degradation and keeps cabinet interiors from developing mold or mildew smells.
Refinishing down the road: If the finish chips or you want a color change, most painted vanities can be sanded (220-grit), primed with a bonding primer like Zinsser B-I-N or KILZ Adhesion, and repainted. Remove doors and drawer fronts for even coverage and to avoid drips. Two thin coats of a water-based cabinet enamel, followed by a clear topcoat, will hold up better than standard wall paint. This is a manageable weekend project if you have a HVLP sprayer or quality foam roller, brush marks are tough to avoid on slab doors.
For design inspiration and real-world bathroom transformations featuring blue vanities, browse galleries on HGTV, where finished projects often include product sources and contractor insights. Seeing installations in context helps calibrate your expectations and spot details, hardware spacing, countertop overhang, toe-kick height, that photos alone don’t always reveal.