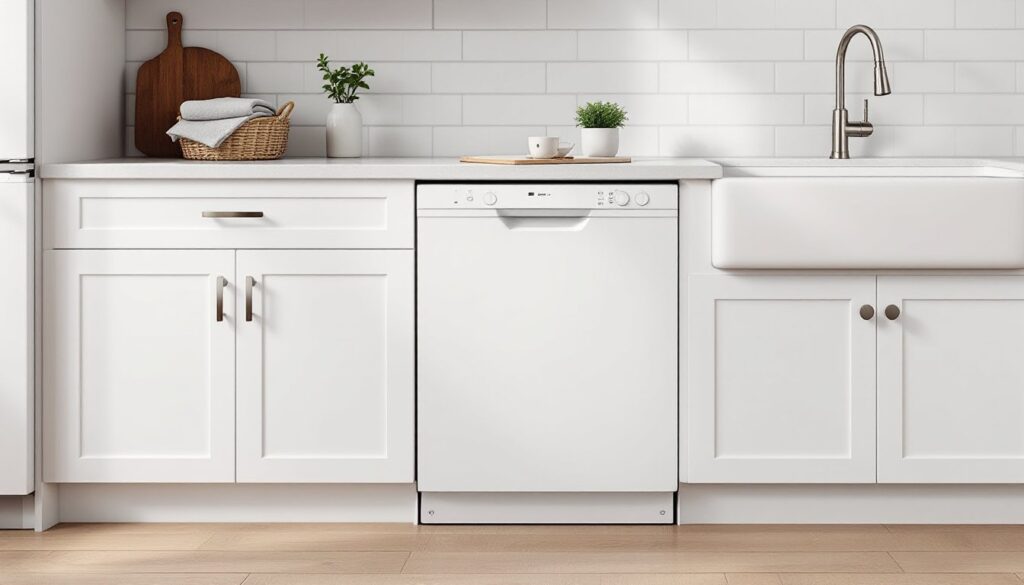
White dishwashers aren’t just making a comeback, they never really left. While stainless steel dominated for years, white dishwashers are experiencing a resurgence among homeowners who value versatility, clean aesthetics, and budget-friendly options. Whether you’re hunting for a new white dishwasher during a kitchen remodel or snagging a white dishwasher clearance deal, understanding what to look for makes all the difference. This guide walks through the key features, installation considerations, and maintenance tips that’ll help you choose and care for the right white dishwasher for sale that fits your kitchen and lifestyle.
Table of Contents
ToggleKey Takeaways
- White dishwashers cost $50–$150 less than identical stainless steel models while offering superior versatility across kitchen designs and hiding water spots better.
- Prioritize a white dishwasher with a stainless steel tub, adjustable racks, dual or triple spray arms, and ENERGY STAR certification to ensure efficient cleaning and long-term savings.
- Select noise levels of 44 dBA or lower if your kitchen is open-concept, and look for sensor wash cycles that adjust water usage based on soil levels to reduce waste.
- Match your white dishwasher to your kitchen style—farmhouse kitchens benefit from texture variation, modern spaces work with panel-ready models, and Scandinavian designs pair seamlessly with white finishes.
- Proper installation requires correct plumbing connections, a dedicated 15–20 amp circuit, leveling, and countertop mounting; hire a licensed electrician for electrical work to meet code requirements.
- Maintain your white dishwasher’s appearance and performance by cleaning the exterior with mild soap, running monthly vinegar and baking soda cycles, checking the filter monthly, and inspecting hoses annually.
Why White Dishwashers Remain a Timeless Kitchen Choice
White appliances occupy a unique space in kitchen design. They’re neutral enough to work with nearly any color scheme, yet they make a deliberate style statement that stainless steel or black can’t replicate.
The practical advantages start with cost. A dishwasher white in color typically runs $50–$150 less than an identical model in stainless steel. That price difference matters when you’re outfitting an entire kitchen or working within a tight renovation budget. White finishes also hide water spots and fingerprints better than stainless, which means less constant wiping.
From a design perspective, white creates visual continuity in kitchens with white cabinetry, subway tile backsplashes, or farmhouse-style elements. It brightens smaller kitchens by reflecting light rather than absorbing it. And unlike trendy finishes that date a kitchen (remember almond appliances from the ’80s?), white maintains resale appeal across decades.
White dishwashers also pair seamlessly with the popular mixed-metal trend. You can combine white appliances with brass cabinet hardware, stainless faucets, and copper pendant lights without creating visual clutter. That flexibility makes white a smart choice for homeowners who like to update decor elements without replacing major appliances.
Key Features to Look for When Buying a White Dishwasher
Shopping for a white dishwasher for sale involves more than just matching your cabinets. The right features determine how well it cleans, how much it costs to operate, and how long it lasts.
Start with rack configuration. Adjustable upper racks and fold-down tines let you fit odd-sized items like baking sheets, Dutch ovens, and tall travel mugs. A third rack (sometimes called a cutlery rack) adds 30% more loading capacity and keeps utensils from nesting together, which improves cleaning. If you cook frequently, this feature pays off.
Look for stainless steel tubs rather than plastic. Stainless interiors dry dishes better, resist staining, and typically indicate a higher-quality build. They also improve energy efficiency by retaining heat during the wash cycle.
Wash arms matter more than most people realize. Dual or triple spray arms with multiple jets provide better coverage than single-arm designs. Check that the arms rotate freely and aren’t blocked by tall items, many cleaning failures trace back to blocked spray arms.
Finally, consider cycle options. A heavy-duty cycle tackles baked-on casserole dishes. A quick-wash cycle cleans lightly soiled loads in under an hour. Sanitize cycles reach 150°F or higher, which kills 99.9% of bacteria, useful for baby bottles, cutting boards, or when someone’s been sick.
Energy Efficiency and Water Usage Ratings
ENERGY STAR certification should be non-negotiable. Certified models use about 3.5 gallons of water per cycle versus 10 gallons for older, non-certified dishwashers. That translates to roughly 1,300 gallons saved per year.
Check the yellow EnergyGuide label on any dishwasher you’re considering. It shows estimated annual operating costs based on average electricity rates and usage. Models typically range from $30–$55 per year. A $10 annual difference might not sound significant, but over a 10-year lifespan, that’s $100, plus the environmental impact.
Water efficiency isn’t just about gallons used. Modern sensor technology in dishwashers adjusts cycle length and water temperature based on soil levels, which prevents waste. Soil sensors add $30–$50 to the purchase price but typically pay for themselves within two years.
Noise Levels and Cycle Options
Decibel ratings (dBA) determine whether you’ll hear your dishwasher from the next room or barely notice it running. Here’s the practical breakdown:
- 50+ dBA: Noticeably loud, comparable to normal conversation volume
- 44–49 dBA: Moderate noise, noticeable in open-concept kitchens
- 40–43 dBA: Quiet, similar to a library or soft rainfall
- Under 40 dBA: Nearly silent, premium models only
If your kitchen opens to a living room or you run the dishwasher while entertaining, aim for 44 dBA or lower. Noise reduction comes from better insulation, which also improves energy efficiency. Most manufacturers achieve lower decibels through sound-dampening materials around the tub and a insulated base.
Cycle options vary widely by model. Basic models offer 3–4 cycles: mid-range models provide 6–8. The most useful cycles include:
- Auto/sensor wash: Adjusts automatically based on soil level
- Heavy/pots and pans: Extended wash time with higher heat
- Quick/express: 30–60 minutes for lightly soiled items
- Rinse only: Prevents food from drying until you run a full load
- Sanitize: NSF/ANSI Standard 184 requires final rinse temperatures of 150°F minimum
Some models offer delay start, which lets you program the dishwasher to run during off-peak electricity hours (check with your utility company about time-of-use rates). It’s a small feature that can trim operating costs if you have a time-variable electricity plan.
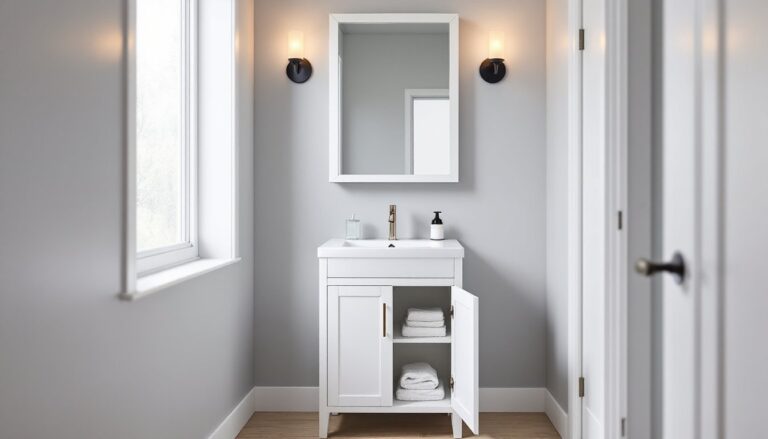
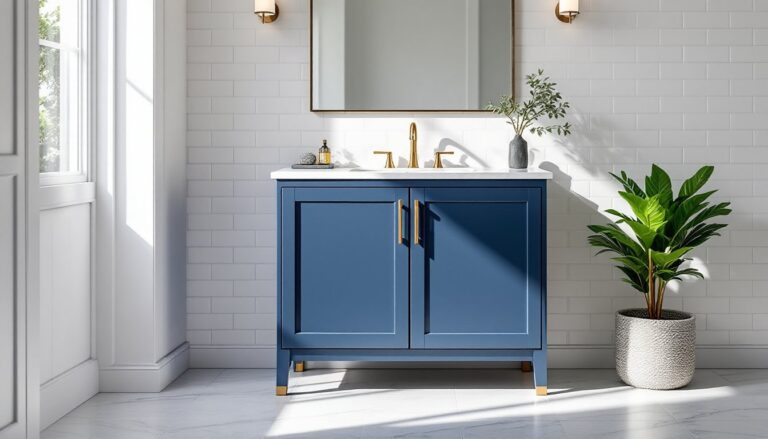
How to Match Your White Dishwasher with Different Kitchen Styles
White dishwashers adapt to nearly any kitchen aesthetic, but the approach differs based on your overall design direction.
Farmhouse and cottage kitchens are natural homes for white appliances. Pair a white dishwasher with shaker-style cabinets, open shelving, and butcher block countertops. The key is creating texture variation, otherwise, an all-white kitchen reads as sterile rather than cozy. Add visual interest through subway tile backsplashes in brick or herringbone patterns, vintage-style faucets, or exposed ceiling beams.
Modern and minimalist spaces benefit from white dishwashers with clean lines and minimal visible controls. Look for models with top-mounted control panels (sometimes called “fully integrated” or “panel-ready” dishwashers) that hide all buttons and displays. This creates a seamless cabinet look when the door’s closed. For design inspiration and modern kitchen appliance integration ideas, consider how appliances function as both tools and visual elements.
Transitional kitchens, those blending traditional and contemporary elements, work well with white dishwashers alongside mixed finishes. Combine white appliances with warm wood tones, neutral gray cabinets, and a statement island in a contrasting color. White acts as the visual anchor that prevents too many competing elements.
Scandinavian-style kitchens practically demand white appliances. The aesthetic emphasizes light, functionality, and simplicity. A dishwasher white in finish complements pale wood floors, white or light gray cabinetry, and minimal hardware. Add warmth through natural textiles, simple plants, and wood cutting boards displayed on open shelves.
One design trap to avoid: matching white dishwashers with off-white or cream cabinets. Unless the tones are nearly identical, the slight mismatch looks unintentional rather than deliberate. Either commit to true white across appliances and cabinets, or create deliberate contrast with darker cabinet colors.
Installation Tips for Your White Dishwasher
Installing a dishwasher isn’t structurally complex, but it involves plumbing, electrical, and carpentry elements that require attention to detail. If you’re replacing an existing dishwasher, the job’s straightforward. First-time installations require more planning.
Before you start, verify your new dishwasher’s dimensions. Standard dishwashers measure 24 inches wide, 24 inches deep, and 34 inches tall, but models vary by up to an inch. Opening dimensions need an additional 1/4 inch on sides for clearance. If you’re buying a new white dishwasher for a tight space, measure twice and account for the door swing when fully open.
You’ll need these connections:
- Hot water supply line (typically 3/8-inch compression fitting)
- Drain line (usually 5/8-inch corrugated or 7/8-inch ribbed hose)
- Electrical supply (either hardwired or a dedicated 120V outlet)
Electrical requirements follow the National Electrical Code (NEC), which mandates a dedicated 15- or 20-amp circuit for dishwashers. Most models draw 10–15 amps during operation. If you’re adding a dishwasher to a kitchen without existing provisions, hire a licensed electrician to run the circuit. This isn’t optional, it requires pulling permits in most jurisdictions.
Plumbing preparation starts with shutting off the hot water supply at the nearest valve (usually under the kitchen sink). You’ll connect the supply line to the dishwasher inlet valve using a compression fitting, hand-tighten, then add 1/4 turn with an adjustable wrench. Over-tightening cracks the brass fitting.
The drain connection ties into your sink’s drain pipe using a wye fitting or connects to the garbage disposal’s dishwasher inlet. Create a high loop with the drain hose, it should rise to within 1 inch of the underside of the countertop before descending to the drain connection. This prevents backflow. Some codes require an air gap fitting mounted on the sink or countertop: check local requirements.
Leveling the dishwasher prevents leaks and ensures proper door operation. Most models have adjustable front legs and a rear roller or adjustable foot. Use a torpedo level across the top front edge, adjust until bubble centers. Front-to-back level matters less, but the dishwasher shouldn’t tip forward when the door’s open.
Finally, secure the dishwasher to the underside of the countertop using the provided mounting brackets (usually screws through pre-drilled holes in the top frame). Some installers skip this step, which leads to the dishwasher walking forward over time due to vibration.
Safety note: Wear safety glasses when working under the sink and keep a bucket and towels handy for water spills when disconnecting supply lines. If you’re uncomfortable with any electrical work, call a pro. A DIY dishwasher installation typically takes 1–2 hours for an experienced homeowner: factor in 3–4 hours if it’s your first time.
Maintaining Your White Dishwasher to Keep It Looking New
White finishes show dirt, grease splatter, and discoloration more readily than stainless steel or black appliances. Regular maintenance keeps your dishwasher white and prevents issues that shorten its lifespan.
Exterior cleaning requires the right approach. Never use abrasive cleaners, steel wool, or scouring pads on white finishes, they create micro-scratches that trap dirt and yellow over time. Instead, use a solution of warm water and mild dish soap with a microfiber cloth. For stubborn grease, add a tablespoon of baking soda to the solution.
If your white dishwasher develops yellowing (common in kitchens with gas ranges due to combustion byproducts), try a paste of baking soda and hydrogen peroxide. Apply, let sit for 10 minutes, then wipe clean. For persistent staining, automotive polishing compounds designed for white cars work surprisingly well, apply with a soft cloth in circular motions, then buff clean.
Interior maintenance starts with the filter. Most modern dishwashers use self-cleaning filters or manual filters that require monthly cleaning. To access it, remove the lower dish rack and twist or lift the filter assembly (consult your manual for the specific mechanism). Rinse under hot water and scrub with a soft brush to remove trapped food particles. A clogged filter is the #1 cause of poor cleaning performance.
Run a dishwasher cleaner monthly to prevent mineral buildup, grease accumulation, and odors. You can buy commercial cleaners or make your own: place a dishwasher-safe bowl with 1 cup of white vinegar on the top rack and run a hot cycle. Follow with a baking soda rinse, sprinkle 1 cup across the bottom and run a short hot cycle. This combination breaks down grease and neutralizes odors.
Inspect the door gasket quarterly for cracks, tears, or mold growth. Clean it with a solution of equal parts water and white vinegar. If the gasket hardens or tears, replace it, most cost $20–$40 and snap into place without tools. A compromised gasket causes leaks that can damage flooring.
Check spray arms for clogs every few months. Remove them (they usually twist off or have a center cap that unscrews) and clear holes with a toothpick or small wire. Hard water deposits commonly block jets and reduce cleaning effectiveness. For homes with hard water, consider using a rinse aid and proper detergent to prevent buildup and improve drying performance.
Water supply line and drain hose inspections should happen annually. Look for cracks, bulges, or signs of wear on rubber hoses. Braided stainless steel supply lines last longer but eventually fail, replace them every 8–10 years as preventive maintenance. A burst supply line can dump gallons of water before you shut off the valve.
Finally, leave the dishwasher door ajar for 15–20 minutes after cycles finish. This allows moisture to escape and prevents mold growth on gaskets and in hidden crevices. It’s a simple habit that extends the life of seals and eliminates musty odors.