Finding water pooling under your refrigerator or collecting inside the fresh food compartment isn’t just annoying, it’s a sign something’s off. Water leaking from a refrigerator usually stems from a handful of fixable issues, most of which don’t require calling in a pro. Before you panic or start shopping for a new appliance, understand that many refrigerator water leaks result from clogged drain lines, misaligned pans, or worn seals, problems you can diagnose and fix yourself with basic tools. This guide walks through the seven most common reasons why a refrigerator leaks water, how to identify each cause, and the practical steps to resolve them.
Table of Contents
ToggleKey Takeaways
- Most common refrigerator water leaks stem from clogged defrost drains, misaligned drain pans, or worn door seals—issues you can fix yourself with basic tools and minimal cost.
- A clogged or frozen defrost drain is the leading cause of water pooling inside the fresh food compartment; clear it by flushing warm water mixed with baking soda through the drain hole at the back of the unit.
- Check your refrigerator’s door gasket by closing it on a dollar bill; if the bill slides out easily, the seal is failing and allowing humid air to enter, causing excessive condensation that leaks inside or down the exterior.
- Water under the refrigerator often signals a cracked or misaligned drain pan or a loose water supply line fitting—both accessible repairs that cost under $50 in replacement parts.
- Environmental factors like high humidity and frequent door openings can trigger condensation buildup; reduce this by maintaining 35–38°F in the fresh food compartment, limiting door openings, and ensuring at least 1 inch of clearance around the unit for airflow.
- Call a professional technician if the defrost drain freezes repeatedly, water leaks from inside the walls, the compressor runs constantly, or you’re uncomfortable working with water supply lines.
Understanding Why Refrigerators Leak Water
Refrigerators produce water through normal operation. The automatic defrost cycle melts frost from the evaporator coils several times a day, sending that meltwater down a drain tube to a collection pan where it evaporates. Also, if the unit has an ice maker or water dispenser, pressurized water flows through internal lines. Any disruption to these systems, whether from clogs, cracks, or condensation, can cause water to escape.
Water in a refrigerator typically appears in three places: pooling under the appliance, collecting inside the fresh food compartment (often beneath crisper drawers), or dripping down the exterior front. Each location points to a different culprit. Water under the refrigerator often signals drain pan or supply line issues. Water inside usually means a blocked defrost drain or excessive condensation. Exterior drips near the door suggest seal problems.
Most leaks don’t indicate catastrophic failure. They’re maintenance issues that build up over time, dust accumulation, mineral deposits, or gradual wear. Understanding the refrigerator’s water management systems helps narrow down what causes a refrigerator to leak water and directs troubleshooting efforts efficiently.
Clogged or Frozen Defrost Drain
The defrost drain is the most frequent reason why a refrigerator is leaking water inside. During the defrost cycle, meltwater flows from the evaporator coils through a small drain hole at the back of the freezer or fresh food compartment, down a tube, and into the drain pan below. When this drain hole or tube becomes clogged with food particles, ice, or mineral buildup, water backs up and pools inside the fridge, typically under crisper drawers or along the back wall.
To diagnose this, open the fresh food compartment and remove the crisper drawers. Look for a small drain hole at the back bottom of the compartment, often partially hidden by a plastic cover. If water is present or the hole appears blocked, that’s your problem. In the freezer, check behind the rear panel if accessible (may require removing screws).
Tools needed: Turkey baster or small funnel, warm water, pipe cleaner or flexible brush, towels.
DIY fix steps:
- Unplug the refrigerator for safety.
- Locate the drain hole. Pour a small amount of warm (not boiling) water into it using a turkey baster. If water doesn’t drain freely, the line is clogged.
- Use a pipe cleaner or flexible cleaning brush (approximately 1/8-inch diameter) to gently clear the hole and tube. Work slowly to avoid damaging the tube.
- Flush again with warm water mixed with a tablespoon of baking soda to help dissolve residue.
- Plug the fridge back in and monitor for 24 hours.
If the drain tube is frozen solid, the issue may be a faulty defrost heater or thermostat, components that require appliance technician diagnosis. But, a one-time freeze can be cleared by leaving the unit unplugged for several hours to thaw completely.
Blocked or Misaligned Drain Pan
Every refrigerator has a drain pan (also called a drip pan) located beneath the unit, usually accessible from the front kick plate or rear panel. This shallow pan catches defrost water and relies on the compressor’s heat and ambient air to evaporate it. If the pan is cracked, overflowing, or shifted out of position, water leaks onto the floor.
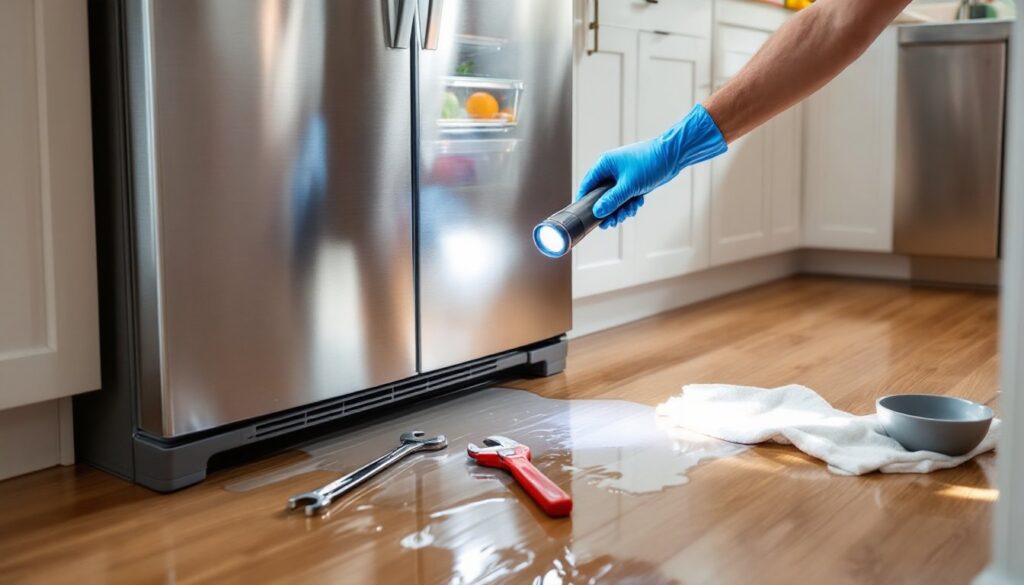
Check for water under the refrigerator first. If it’s a steady puddle that doesn’t correspond to door openings or humidity changes, the drain pan is a likely suspect. Many common refrigerator problems stem from overlooked maintenance like drain hole cleaning or pan inspection.
Tools needed: Flashlight, shallow container, sponge, gloves.
DIY fix steps:
- Unplug the refrigerator and pull it away from the wall carefully (get help if needed, full fridges are heavy).
- Remove the lower front kick plate or rear access panel, depending on your model. Consult the owner’s manual if unclear.
- Locate the drain pan. It’s typically a shallow plastic tray that slides out from the front.
- Inspect for cracks, warping, or misalignment. Even a small crack can leak enough water to create a puddle.
- If damaged, order a replacement pan using your refrigerator’s model number. Pans are inexpensive ($15–$40) and specific to each model.
- If the pan is intact but full, check whether the defrost drain is clogged (see previous section) or if the pan isn’t positioned correctly under the drain tube outlet.
- Clean the pan with warm soapy water, dry it, and reinstall securely.
Some models have drain pans that aren’t removable without disassembling major components. If access is restricted or the pan is built-in and cracked, this may require professional service.
Damaged or Improperly Installed Water Supply Line
If the refrigerator has an ice maker or water dispenser, a water supply line runs from the household plumbing to the back of the unit. This line, usually 1/4-inch flexible copper, braided stainless steel, or plastic tubing, can develop leaks from cracks, loose fittings, or punctures. Water leaking from under the refrigerator, especially near the back, often points here.
Inspect the supply line by pulling the fridge forward and examining the connection point at the back. Look for moisture, corrosion, or obvious drips. Check the compression fitting where the line connects to the refrigerator’s inlet valve and the saddle valve or shutoff valve on the wall or floor.
Tools needed: Adjustable wrench, towels, bucket, replacement tubing if needed.
DIY fix steps:
- Turn off the water supply at the shutoff valve (usually behind or beneath the fridge).
- Unplug the refrigerator.
- Inspect the compression nut at the fridge inlet. If it’s loose, tighten it gently with an adjustable wrench, about a quarter turn. Over-tightening can crack the fitting.
- Examine the tubing for kinks, cracks, or punctures. Plastic tubing is prone to cracking over time: copper can develop pinhole leaks.
- If the line is damaged, replace it. Measure the needed length (usually 6 to 10 feet). Braided stainless steel supply lines are more durable than plastic and cost $10–$25.
- Disconnect the old line at both ends, install the new line, and hand-tighten fittings before snugging with a wrench.
- Turn the water back on slowly and check for leaks. Wipe connections dry, wait 10 minutes, then inspect again.
If the leak persists or originates inside the refrigerator’s internal water valve or tubing, that’s a more complex repair best handled by an appliance technician.
Faulty Door Seals Causing Condensation
Worn, torn, or dirty door gaskets (the rubber seals around the door perimeter) allow warm, humid air to enter the refrigerator. This causes excessive condensation inside, which can pool at the bottom or drip down the front of the unit. If you’re wondering why water is leaking from inside your refrigerator without an obvious drain blockage, check the seals.
Test the door seal by closing the door on a dollar bill. If you can pull the bill out easily without resistance, the seal isn’t tight. Repeat this test around the entire door perimeter. Also, inspect the gasket for visible cracks, tears, or food buildup that prevents a clean seal.
Tools needed: Warm soapy water, soft cloth, petroleum jelly (optional).
DIY fix steps:
- Clean the gasket thoroughly with warm soapy water and a cloth. Food residue, grease, and grime prevent proper sealing.
- Dry the gasket completely and inspect for damage.
- If the gasket is stiff or slightly deformed but not torn, apply a thin layer of petroleum jelly to the seal surface. This can restore flexibility and improve the seal temporarily.
- If the gasket is torn, cracked, or permanently deformed, it needs replacement. Door gaskets are model-specific and cost $50–$150. Most snap or screw into a retainer strip around the door.
- To replace, loosen the retainer screws slightly (don’t remove completely), pull out the old gasket, insert the new one starting at the top corners, and retighten screws as you work around the perimeter.
- Check door alignment. If the door sags or doesn’t close squarely, adjust the hinges. Loose hinge screws or worn bushings can prevent a tight seal even with a new gasket.
Safety note: A refrigerator that constantly runs or feels warm inside even though a good thermostat setting may have seal issues contributing to both condensation and energy waste.
High Humidity and Temperature Issues
Environmental factors can cause water to appear in or under a refrigerator even when all components function correctly. High ambient humidity and frequent door openings introduce moist air that condenses on cold surfaces inside the fridge. If the defrost drain and evaporation systems can’t keep up, water accumulates.
This is more common in summer months, in non-climate-controlled garages, or in homes without dehumidification. If water leaking from the refrigerator coincides with hot, humid weather and you’ve ruled out mechanical issues, environment is the likely culprit.
Mitigation steps:
- Reduce door openings. Each time the door opens, humid air rushes in and must be cooled, creating condensation.
- Check the temperature setting. The fresh food compartment should be between 35°F and 38°F: the freezer at 0°F. If set too cold, excessive condensation forms and freezes, potentially blocking the defrost drain. If set too warm, the compressor runs constantly and the defrost cycle may not complete properly.
- Use a dehumidifier in the room if ambient humidity exceeds 60%. High humidity overwhelms the refrigerator’s ability to manage condensation.
- Ensure proper clearance. Refrigerators need airflow around the condenser coils (usually at the back or underneath). If the unit is pushed tight against a wall or surrounded by cabinets with no ventilation, the compressor overheats and the drain pan can’t evaporate water efficiently. Maintain at least 1 inch of clearance on sides and back.
- Clean the condenser coils every six months. Dusty coils reduce cooling efficiency and can cause the compressor to overheat, affecting defrost cycle timing. Use a coil brush and vacuum to remove dust from coils accessible behind the kick plate or rear panel.
Some resources like familyhandyman.com offer seasonal home maintenance checklists that include refrigerator coil cleaning and gasket inspection as preventive measures.
When to Call a Professional vs. DIY Repair
Many refrigerator water leaks are straightforward DIY fixes: clearing a clogged drain, tightening a supply line fitting, or replacing a door gasket. These repairs require basic tools, cost less than $100 in parts, and can be completed in under an hour. But, some issues exceed DIY scope and need a licensed appliance technician.
Call a professional if:
- The defrost drain tube is frozen solid repeatedly, indicating a failed defrost heater, defrost thermostat, or defrost timer. Diagnosing and replacing these components requires multimeter testing and disassembly of internal panels.
- Water leaks from inside the refrigerator walls or from the ice maker assembly, suggesting internal tubing or valve failure. Accessing these parts often requires significant disassembly.
- The compressor runs constantly, the refrigerator doesn’t cool properly, or you hear unusual noises. These symptoms point to refrigerant leaks or compressor failure, problems that require EPA-certified technicians due to refrigerant handling regulations.
- The drain pan is built-in and cracked, requiring major disassembly to access.
- You’re uncomfortable working with water supply lines or lack the tools and space to pull the refrigerator away from the wall safely.
DIY-friendly repairs:
- Clearing clogged defrost drains
- Replacing door gaskets
- Tightening or replacing external water supply lines
- Cleaning or replacing the drain pan
- Adjusting door hinges or leveling feet
- Cleaning condenser coils
Most appliance repair calls for water leaks cost $150–$300 depending on diagnosis and parts. If the refrigerator is older than 10 years and requires a major component replacement (compressor, evaporator coils), consider the repair cost against replacement. Modern refrigerators have an average lifespan of 10–15 years.
For ongoing homeowner advice and maintenance tips, many DIYers find value in seasonal checklists and appliance care guides that help catch small issues before they become expensive repairs.
Safety reminder: Always unplug the refrigerator before performing any repair that involves accessing internal components or electrical connections. If working with water supply lines, turn off the water source first. Wear gloves and safety glasses when working with cleaning chemicals or sharp metal edges inside the unit.