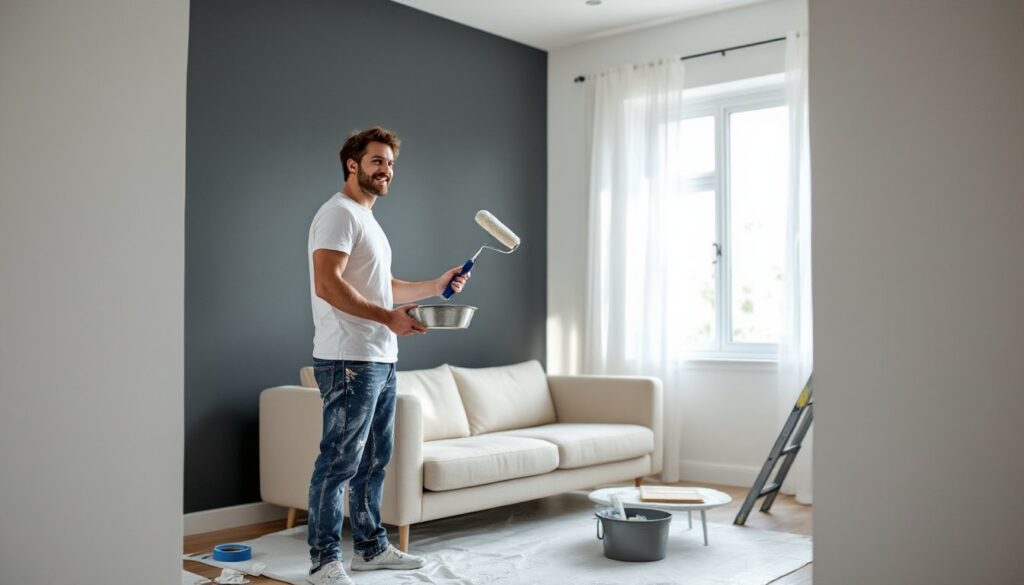
An accent wall can turn a flat, forgettable room into something with depth and character, without the commitment or expense of redoing every surface. It’s one of the most accessible DIY projects for homeowners who want visual impact but aren’t ready to gut a space. Whether you’re working with paint, wallpaper, wood planks, or tile, the concept is the same: highlight one wall to anchor the room and give the eye somewhere to land. Done right, it adds dimension. Done poorly, it screams “I watched one design video and stopped halfway through.” This guide walks through the planning, materials, execution, and budgeting you’ll need to pull it off cleanly.
Table of Contents
ToggleKey Takeaways
- An accent wall adds visual depth and character to a room by highlighting one wall with bold color, texture, or material like wood or tile, transforming a flat space into a focal point without the cost of a full renovation.
- Proper prep work—including leveling, measuring, cleaning, and applying painter’s tape or marking plumb lines—is critical to executing an accent wall cleanly and avoiding compounding errors that become obvious by the third panel.
- Paint is the most budget-friendly accent wall option at $50–$100 total for a 120-square-foot wall, while peel-and-stick wallpaper ranges $130–$375 and wood planks cost $150–$350, making DIY cost-effective compared to hiring professionals.
- Choose the wall you see first when entering the room, such as behind a bed, sofa, or fireplace, and avoid walls with excessive windows or doors, as interruptions will kill the visual impact of the accent wall.
- Common mistakes like skipping level checks, using the wrong paint finish, overloading small rooms, and ignoring expansion gaps can compromise results, so measure twice, sample paint in different light, and allow 24–48 hours for materials to cure before hanging décor.
- An accent wall is an ideal low-commitment DIY project for homeowners learning to cut in paint edges, work with peel-and-stick materials, or handle basic carpentry, offering design experimentation and skill-building without month-long renovation disruption.
What Is Accent Walls and Why Does It Matter?
An accent wall is a single wall in a room treated differently from the others, usually with a bold paint color, contrasting texture, or eye-catching material like reclaimed wood or geometric tile. The goal is to create a focal point that draws attention without overwhelming the space.
It matters because most rooms need a visual anchor. Without one, furniture and decor can feel scattered or the space reads as bland. An accent wall solves that by giving the room structure and intention. It also lets homeowners experiment with bolder design choices (navy blue, peel-and-stick wallpaper, shiplap) without committing an entire room to the look.
From a practical standpoint, accent walls are forgiving. If you’re nervous about color or trying a new finish, confining it to one wall limits risk and cost. You’re painting or tiling roughly 100–150 square feet in a standard bedroom, not 400. That means less material, less labor, and an easier pivot if the result isn’t what you envisioned.
Accent walls work best on the wall you see first when entering a room, behind a bed or sofa, or on a wall with architectural interest like a fireplace or built-in shelving. Avoid walls with too many windows or doors, the interruptions kill the effect.
Key Benefits of Accent Walls for Your Home
Defines zones in open-concept layouts. If your living and dining areas share one large space, an accent wall behind the sofa or dining table visually separates functions without requiring a physical divider.
Hides imperfections. A textured accent wall, think board-and-batten, tongue-and-groove paneling, or heavy geometric wallpaper, camouflages minor drywall flaws, old patch jobs, or slight waves in plaster that catch light awkwardly.
Increases perceived room depth. A darker accent wall at the far end of a narrow room can make the space feel cozier and less tunnel-like. Conversely, a lighter or textured accent wall can add dimension to a boxy room.
Offers a low-commitment design refresh. Repainting or swapping out peel-and-stick wallpaper is a weekend project, not a month-long renovation. Homeowners get the psychological benefit of a room update without the disruption or cost of a full remodel.
Boosts resale appeal when done tastefully. Neutral base walls with a well-executed accent (charcoal gray, deep green, natural wood tone) signal that the home has been maintained and thoughtfully designed. Avoid overly trendy colors or loud patterns if resale is a near-term goal.
Supports DIY skill-building. Accent walls are ideal first projects for learning to cut in paint edges, apply peel-and-stick materials evenly, or work with a miter saw for trim or paneling.
Essential Materials and Tools You’ll Need
What you need depends on your chosen treatment. Below are the most common accent wall types and their requirements.
Paint Accent Wall
Materials:
- Interior paint (satin or eggshell finish for most rooms: semi-gloss for high-moisture areas like bathrooms)
- Primer if painting over dark existing color or raw drywall
- Painter’s tape (1.5-inch or 2-inch width)
- Drop cloths
Tools:
- Paint roller with ½-inch nap cover (⅜-inch for smooth walls)
- Angled 2.5-inch sash brush for cutting in
- Paint tray and liners
- Stir stick
Wallpaper or Peel-and-Stick Accent Wall
Materials:
- Wallpaper or peel-and-stick panels (measure wall square footage and add 10–15% waste)
- Wallpaper paste (if not peel-and-stick)
- Primer/sealer if applying over bare drywall
Tools:
- Smoothing tool or plastic squeegee
- Utility knife with fresh blades
- Level and tape measure
- Seam roller
Wood Plank or Shiplap Accent Wall
Materials:
- 1×6 or 1×8 tongue-and-groove pine, shiplap, or MDF boards (actual dimensions: ¾” x 5.5″ or ¾” x 7.25″)
- Construction adhesive and 18-gauge brad nails (1.5-inch)
- Wood filler and sandpaper
- Paint or stain + polyurethane (if finishing the wood)
Tools:
- Miter saw or circular saw
- Nail gun (18-gauge brad nailer) or hammer
- Level, stud finder, tape measure
- Caulk gun
General PPE
- Safety glasses (mandatory when cutting or nailing)
- Dust mask or respirator (for sanding, cutting MDF, or using oil-based products)
- Work gloves
Step-by-Step Guide to Implementing Accent Walls
1. Choose Your Wall and Treatment
Identify the wall with the most visual weight, typically the one behind the bed, sofa, or fireplace. Measure the wall’s width and height to calculate square footage. Decide on paint, wallpaper, or wood based on your skill level, budget, and the room’s style.
2. Prep the Surface
For paint: Remove outlet covers, patch any holes with spackle, and sand smooth once dry. Wipe down the wall to remove dust. Apply painter’s tape along edges, baseboards, and ceiling line.
For wallpaper: Ensure the wall is clean and smooth. Prime raw drywall to improve adhesion. Mark a vertical plumb line using a level, wallpaper seams will follow this.
For wood planks: Locate and mark studs with a stud finder. Studs are typically 16 inches on center in modern framing. Remove baseboards if you plan to run planks floor-to-ceiling.
3. Apply Your Material
Paint: Cut in edges with the angled brush first, work in 3-foot sections along corners, trim, and ceiling. Then roll the main area in a W pattern to avoid streaks. Apply a second coat after 2–4 hours (check paint can for recoat time). One gallon covers roughly 350–400 square feet, so a standard 10×10 wall needs less than a quart per coat.
Wallpaper: Start at the plumb line and work outward. For peel-and-stick, peel a few inches at the top, align it carefully, then smooth downward in sections. Use the squeegee to push out air bubbles. Trim excess at ceiling and baseboards with a sharp utility knife. Many homeowners find inspiration in budget-friendly room transformations that showcase creative wallpaper use.
Wood planks: Start at the bottom (or top, depending on preference). Apply a bead of construction adhesive to the back of the first plank, press it level against the wall, and nail into studs. Use two nails per stud to prevent warping. Butt the next plank tightly against the first (or leave a small reveal if using shiplap). Rip the final course to width with a circular saw or table saw if needed. Fill nail holes with wood filler, sand smooth, then paint or stain.
4. Finish and Clean Up
Remove painter’s tape before paint fully dries to avoid peeling. Reinstall outlet covers. For wood walls, apply finish (paint, stain, or clear coat) and reinstall baseboards. Vacuum dust and wipe surfaces.
5. Let It Cure
Allow 24–48 hours before hanging artwork or moving furniture against the wall. Paint needs time to cure fully, and adhesive-backed materials benefit from settling.
Common Mistakes to Avoid
Skipping the plumb line or level. Walls and ceilings are rarely perfectly straight. If you align your first row of wallpaper or planks to the ceiling line instead of a true vertical, the error compounds and becomes obvious by the third panel.
Using the wrong paint finish. Flat paint shows every touch mark and doesn’t clean well. In high-traffic or high-moisture rooms, use at least satin or semi-gloss. Eggshell is the sweet spot for most living areas.
Overloading one wall in a small room. A bold accent works when the surrounding walls are neutral. If you paint one wall charcoal and leave the others beige, great. If you add busy wallpaper, the room can feel chaotic. Keep contrast intentional.
Not accounting for outlets and switches. Measure and cut carefully around electrical boxes. For wallpaper, turn off power at the breaker, remove covers, apply paper over the opening, then cut an X and trim flush. For wood, notch planks to fit around boxes.
Ignoring expansion gaps with wood. Leave a ⅛-inch gap at the top and bottom of a wood plank wall to allow for seasonal expansion and contraction. Baseboards and crown molding will cover the gaps.
Choosing a loud color or pattern on the wrong wall. If the accent wall is the first thing visitors see when they enter your home, keep it sophisticated. Save the bold geometric or tropical print for a bedroom or office where it won’t fatigue daily.
Painting over grease or moisture. Kitchens and bathrooms need a degreaser wipe-down and a stain-blocking primer before paint. Otherwise, stains bleed through within weeks.
Cost Breakdown and Budget-Friendly Tips
Costs vary by region, material grade, and labor (if hiring out). Below are typical ranges for a 120-square-foot accent wall (roughly 10 feet wide by 12 feet tall).
Paint Accent Wall
- Paint: $30–$60 per gallon (you’ll need less than one)
- Primer: $20–$35 per gallon (if needed)
- Supplies (tape, drop cloths, roller, brush): $15–$25
- Total DIY cost: $50–$100
Peel-and-Stick Wallpaper
- Wallpaper: $1–$3 per square foot ($120–$360 for 120 sq ft)
- Supplies (smoothing tool, utility knife): $10–$15
- Total DIY cost: $130–$375
Traditional wallpaper runs slightly cheaper per square foot but requires paste and more skill.
Wood Plank Wall
- Lumber (1×6 pine or MDF): $0.60–$1.50 per linear foot: you’ll need roughly 180–200 linear feet for 120 sq ft of coverage
- Adhesive and nails: $15–$25
- Finish (paint or stain): $25–$50
- Total DIY cost: $150–$350
Reclaimed or higher-grade hardwood can push costs above $500.
Budget-Friendly Tips
- Buy mistinted or returned paint from the hardware store’s discount rack. As long as the color works, you’ll save 50–70%.
- Use MDF or primed pine instead of hardwood for plank walls. MDF is smooth, affordable, and takes paint well.
- Limit the accent to half-height or a smaller feature wall (behind a headboard or in an alcove) to cut material costs.
- Rent or borrow tools like miter saws or nail guns from a local tool library or big-box store. Rental runs $20–$40 per day.
- Sample paints first. Buy quart-size testers ($5–$10 each) and paint poster board samples you can move around the room in different light before committing to a gallon.
- Check for peel-and-stick wallpaper remnants or clearance rolls online. Discontinued patterns often go for 40–60% off.
Conclusion
An accent wall is a straightforward way to add personality and structure to a room without overhauling the whole space. The key is choosing the right wall, prepping the surface properly, and matching the treatment to your skill level and budget. Whether it’s a fresh coat of bold paint, textured wallpaper, or rustic wood planks, the process is manageable for most DIYers with a free weekend and basic tools. Take your time with prep, double-check measurements, and don’t skip the level, those small steps make the difference between a feature wall and a regrettable experiment.