Corner kitchen cabinets divide homeowners into two camps: those who see dead space and those who see untapped potential. That awkward 90-degree angle where two cabinet runs meet often becomes a black hole for Tupperware lids and forgotten cookware. But with the right hardware and design, corner cabinets in kitchen layouts can deliver more usable storage than twice their footprint in standard base units. The key is understanding which corner solution fits the kitchen’s workflow, cabinet box construction, and how often someone’s willing to reach into the back. This guide breaks down the working options, from rotating Lazy Susans to pull-out blind systems, and what to watch for during selection and install.
Table of Contents
ToggleKey Takeaways
- Kitchen corner cabinets can recover 20–30% of base cabinet storage when properly designed with rotating shelves, pull-outs, or angled doors, eliminating dead space that wastes valuable kitchen layout real estate.
- Three main corner cabinet solutions—Lazy Susans, diagonal cabinets, and pull-out systems—each offer different trade-offs; choosing the right one depends on door clearance, cabinet depth, and how frequently items will be accessed.
- Quality hardware matters more than the cabinet style itself: invest $150–$300 per corner in durable rotating or sliding systems rated for daily use to avoid frustration and failure over time.
- Precise installation is critical for corner cabinets—walls must be checked for plumb and square, hardware must be installed before wall mounting, and blind corner pull-outs require measurements within 1/8 inch or baskets will bind.
- Avoid common pitfalls like installing a Lazy Susan adjacent to a dishwasher or range door, mixing cabinet depths without filler panels, or leaving corner cabinets without access doors for periodic hardware repairs.
- Evaluate your kitchen’s actual needs before selecting a corner solution: everyday-use corners need active hardware, while occasional-access corners can use simpler blind designs or fixed shelving to save budget and complexity.
Why Corner Cabinets Are Both a Challenge and an Opportunity
Corner cabinets kitchen installations present a geometric problem: standard 24-inch-deep base cabinets create a 24-by-24-inch dead zone when they meet at a right angle. A homeowner can’t physically reach items stored more than 18 inches back without crawling inside the cabinet or pulling everything forward.
But that same corner often represents 20 to 30 percent of a kitchen’s base cabinet footprint in L- or U-shaped layouts. Wasting it means losing storage capacity equivalent to two or three full-size drawers. Well-designed corner cabinets for corners solve this by using rotating shelves, sliding trays, or angled door fronts that bring the back of the cabinet within arm’s reach.
The challenge isn’t just access, it’s also structural. Corner cabinets require reinforced side panels to support hardware like Lazy Susan poles or pull-out track systems, which add weight and pivot stress. Cabinet manufacturers build corner units with thicker 3/4-inch plywood sides instead of the 1/2-inch particleboard common in standard boxes. Installers also need to account for door swing clearance, appliance placement, and whether the corner sits at an inside or outside angle (peninsulas change the math).
Another consideration: corner cabinets often anchor the kitchen’s layout. If the corner unit is out of square or installed at the wrong height, every cabinet downstream will compound the error. That’s why many pros install corner bases first, then work outward.
Types of Corner Cabinet Designs for Every Kitchen Layout
Not all corner solutions work in every kitchen. Cabinet depth, door swing direction, and adjacent appliances all influence which design makes sense. Here are the three most common systems, along with their trade-offs.
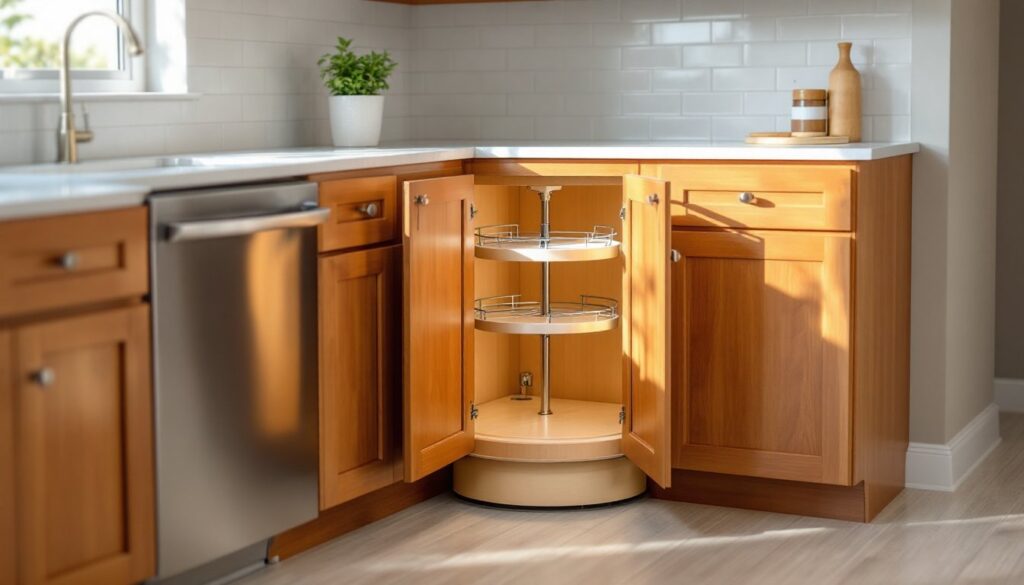
Lazy Susan Corner Cabinets
Lazy Susan cabinets use two or three circular shelves mounted on a center pole, allowing the entire contents to rotate 360 degrees. They come in two styles: full-round (two pie-cut doors that open together) and kidney-shaped (single door with D-shaped shelves).
Full-round Lazy Susans maximize storage but require both doors to open simultaneously, which can interfere with adjacent drawers or appliances. Kidney-shaped units waste about 15 percent of the shelf area but use a single door, making them easier to fit in tight layouts.
The hardware itself ranges from plastic pole-and-shelf kits (under $50) to ball-bearing polymer systems with soft-close dampers ($150–$250). Cheaper units wobble under uneven loads and can bind if shelves are overloaded on one side. For heavy cookware or small appliances, upgrade to a model with reinforced shelves rated for 30–40 pounds per tier.
One common mistake: installing a Lazy Susan in a corner adjacent to a dishwasher or range. When the appliance door is open, it blocks access to the cabinet. Always leave at least 6 inches of clearance between the Lazy Susan door and any appliance hinge.
Diagonal Corner Cabinets
Diagonal corner cabinets replace the 90-degree corner with a 45-degree angled front, creating a single wide door that opens directly into the deepest part of the cabinet. This eliminates the need for rotating hardware and provides a clear view of the entire interior.
The angled front “steals” a few inches from adjacent countertop space, so the effective counter run is shorter than a standard corner layout. But for kitchens where countertop prep area isn’t the limiting factor, diagonal cabinets offer the simplest access.
These cabinets work best in larger kitchens where losing 6–8 inches of counter width doesn’t compress the workspace. They’re also a good retrofit option in older homes where existing corner cabinets have no internal hardware, replacing the box with a diagonal unit is often cheaper than retrofitting a Lazy Susan pole.
Door size matters here. A 24-inch-wide diagonal door requires Euro-style hinges rated for at least 20 pounds, and the cabinet face frame or frameless box must have solid-wood mounting points. Particle-board-only construction won’t hold the hinge screws under repeated use.
Blind Corner Cabinets with Pull-Out Systems
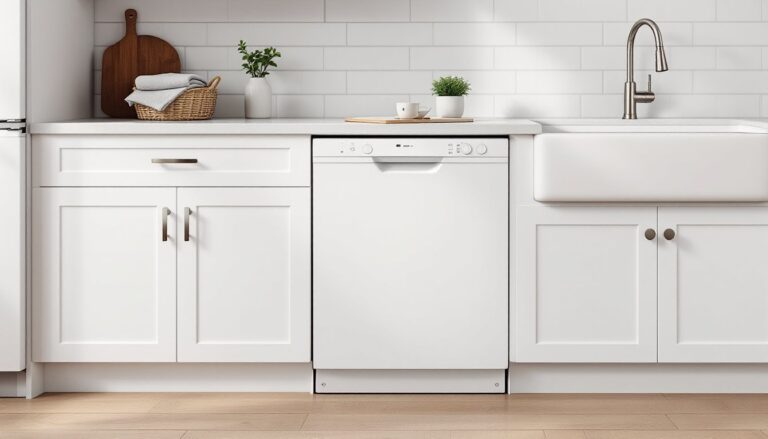
Blind corner cabinets are standard rectangular boxes installed in the corner, with one side panel hidden (“blind”) behind the adjacent cabinet’s door. The exposed section gets a normal door, but the blind section, often 12–18 inches deep, remains inaccessible without pull-out hardware.
The best blind-corner solutions use pull-out shelf systems like Rev-A-Shelf’s two-tier baskets or Häfele’s Magic Corner, which swing out and forward when the door opens. These systems bring items from the blind side into full view without requiring the homeowner to reach or crouch.
Installing pull-out hardware isn’t plug-and-play. The cabinet must have precisely square corners and a minimum interior depth of 22 inches to accommodate the sliding tracks. Measurements need to be within 1/8 inch, any more and the baskets bind or won’t close flush. Most DIYers find this installation frustrating: hiring a cabinet installer for this step alone costs $100–$200 but avoids wasted hardware and do-over time.
Blind corners are the least expensive option upfront (no special door or angled box), but adding quality pull-out hardware later can push the total cost above a Lazy Susan. For budget-conscious remodels, some homeowners leave blind corners “dumb” (no hardware) and use them for seldom-accessed items like seasonal platters or bulk paper goods.
How to Choose the Right Corner Cabinet for Your Kitchen
Selecting the right corner cabinet starts with measuring the available space and understanding how the kitchen gets used day-to-day. Three factors matter most: cabinet box depth, door clearance, and frequency of access.
First, measure the depth of both cabinet runs that meet at the corner. Standard base cabinets are 24 inches deep, but older homes or custom builds may use 21- or 27-inch depths. The corner solution must fit the shallowest side, mixing depths often requires a filler panel, which eats into usable space.
Next, check door and appliance clearances. Open every adjacent door, drawer, and appliance (especially the dishwasher and range) and measure how much space remains. If a dishwasher door extends 22 inches when open and the corner cabinet door needs 18 inches of swing, there’s only 4 inches of overlap, workable, but tight. If both doors need to open simultaneously (common when unloading dishes), the layout won’t function well. In that case, a diagonal cabinet or a single-door Lazy Susan is a better fit.
Frequency of access is the most overlooked factor. If the corner will hold everyday dishes, pots, or food storage, a Lazy Susan or pull-out system is essential. For items used once a month or less, a simple blind corner or even open shelving saves money without sacrificing function. Some homeowners reviewing innovative corner storage discover that removing doors entirely and using baskets on fixed shelves is the simplest path.
Budget plays a role, but don’t cheap out on hardware if the cabinet will see daily use. A $40 plastic Lazy Susan that binds or tips under load creates more frustration than an empty corner. Allocate $150–$300 per corner for quality hardware and hinges, or hire a cabinet pro to install pre-assembled units with lifetime-rated components.
Finally, consider future changes. If a kitchen remodel is planned within five years, investing in a high-end pull-out system may not make sense. A mid-tier Lazy Susan or simple diagonal cabinet keeps the corner functional without over-capitalizing on a temporary layout.
Installation Tips and Common Mistakes to Avoid
Installing corner cabinets demands tighter tolerances than standard runs. The most critical step is establishing level and square at the corner before securing any boxes. Use a 4-foot level on two adjacent walls and check for plumb in both directions. If the walls are out of square by more than 1/4 inch over 4 feet, the corner cabinet will need shims and scribing to fit flush.
Start by dry-fitting the corner cabinet and both adjacent cabinets without fastening anything. Check that doors open fully, hardware operates smoothly, and face frames align. Mark shim locations on the floor and wall, then remove the cabinets and install shims before final placement. Most corners need shims behind at least one side to compensate for wall irregularities.
When securing the cabinet to wall studs, use 2-1/2-inch cabinet screws through the hanging rail or back cleat into solid framing. Drywall anchors won’t support a loaded corner cabinet, especially with rotating hardware. Locate studs with a stud finder or by drilling small test holes (which the cabinet will cover). If no stud exists where the hanging rail falls, add a 2×4 cleat between studs before cabinet install.
A frequent mistake is installing Lazy Susan hardware after the cabinet is mounted. The center pole must be perfectly plumb, which is nearly impossible to adjust once the cabinet is screwed to the wall. Install and test all rotating or pull-out hardware with the cabinet on sawhorses, then mount the completed assembly. This also allows for easier troubleshooting if shelves bind or doors don’t align.
For blind corner pull-outs, pay obsessive attention to the track placement. Most systems include a paper template: tape it inside the cabinet and drill pilot holes exactly where marked. Being off by even 1/4 inch means the baskets won’t glide or will catch on the door frame. If the cabinet interior isn’t perfectly square, some systems allow micro-adjustments via slotted screw holes, use these to fine-tune alignment after initial install.
Door installation on corner cabinets requires checking swing in both open and closed positions. Euro hinges offer 3D adjustment (in/out, up/down, left/right), which is essential for aligning pie-cut Lazy Susan doors or wide diagonal doors. After hanging, load the shelves with real items and open/close the doors a dozen times. Hinges may need re-adjustment once weight settles.
Don’t forget the countertop. Corner seams in laminate or stone require precise miters, and the corner cabinet must be dead-level to support the joint without gaps. Many kitchen remodel guides recommend templating countertops after cabinets are fully installed and leveled, not before.
Finally, leave access for future repairs. If a Lazy Susan pole or pull-out track fails in five years, the homeowner shouldn’t need to remove the countertop to replace it. Ensure removable shelves, accessible mounting screws, and enough clearance to swap hardware without a full tear-out.